Location:Home Page > Archive Archive
Homemade radio for three coins, pretty cute
2023-04-22【Archive】
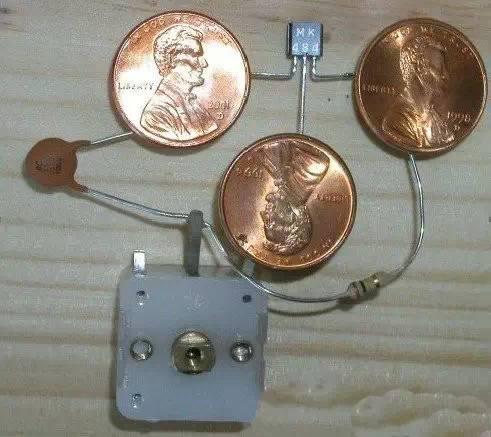
We call this radio "three coin radio" because we use three coins as anchors to connect different parts of radio, which makes our process extremely easy. In this radio, we used a special 10-transistor integrated circuit, which made final radio sound very good.
If you've never played soldering before, this is a great opportunity.
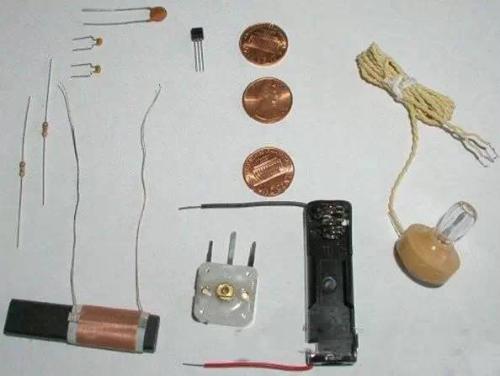
Materials Needed:
Three coins
A tuning coil that you can make yourself, in this project we made a smaller coil with a magnetic rod inside
MK484-1 FM Broadcast Integrated Circuit, heart of radio, integrates amplifier, detector, automatic gain control
Piezoelectric earpiece
Tuning capacitor
100,000 Ohm resistor
1000 Ohm resistor
0.01uF Capacitor
Two 0.1uF capacitors
1.5 V battery
(Optional) 1.5V battery clip
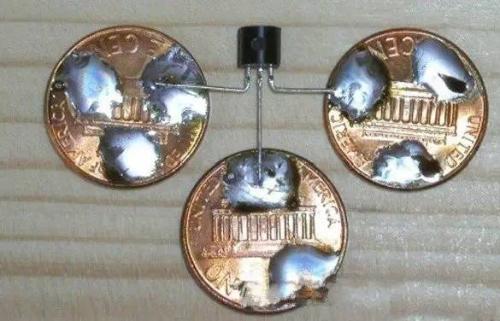
Step 1. Welding IC
Note that all of our soldering work is done from reverse side, and at end finished radio will be upside down so we can't see solder points, making our radio more aesthetically pleasing. Pay attention to front and back of all non-parts during welding process.
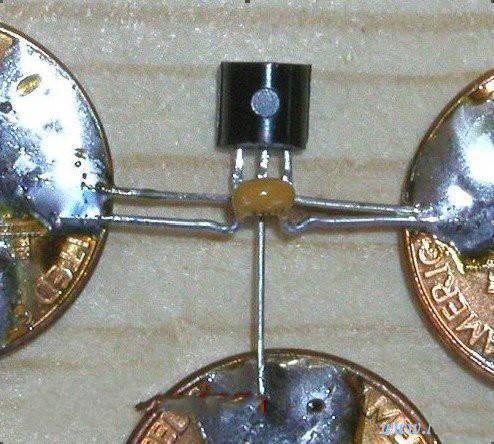
The integrated circuit has a flat surface and a round surface, solder flat surface down and the round surface up. As shown below:
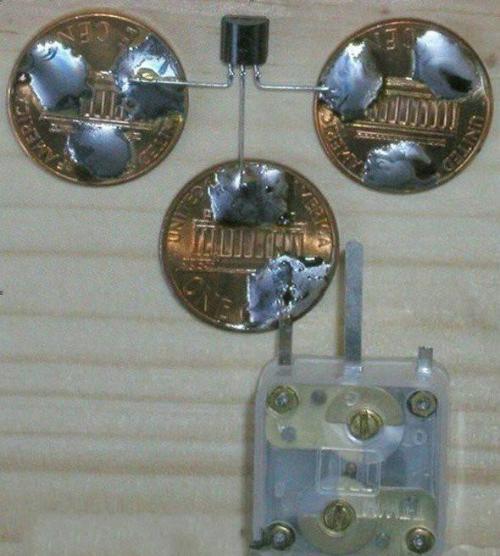
Step Two: Soldering Variable Capacitor
The variable capacitor should also be soldered on opposite side, as shown in figure below:
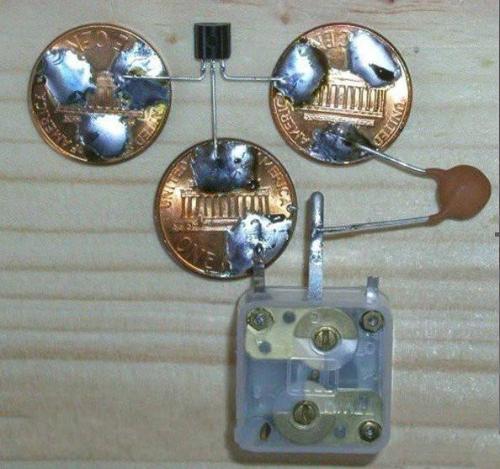
Step 3: Solder 0.01µF capacitors. As shown below:
Step 4: Solder a 100,000 Ohm Capacitor
Be careful not to touch other metal parts as shown below:

Step 5. Welding 0.1uF Capacitor
Be careful not to hit other lines as shown below:
Step 6: Plug in your headset
Connect headphones with a 1000 ohm capacitor and a 0.1 microfarad capacitor as shown below:
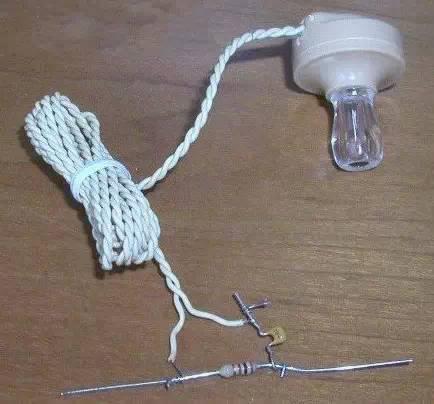
Part seven. Welding resistors for headphones. As shown below:
Step 8: Solder the battery clamps. As shown below:
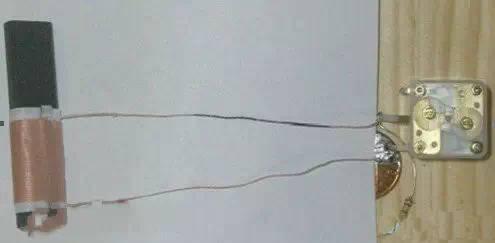
Step Nine: Soldering Coil
To see better, place a piece of paper on top of it. It is important that bar magnet in coil is movable, as we will be tuning in and out of bar.
Step Ten: Variable Capacitor Transformation
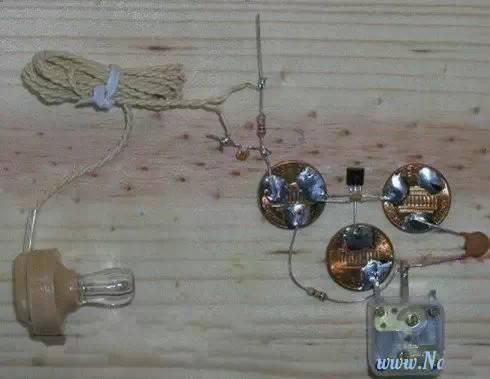
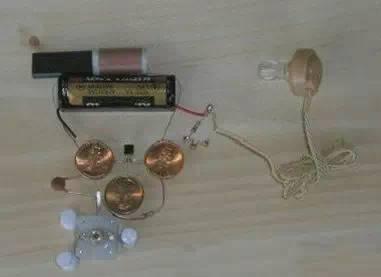
At this point, our project is actually completed, if you install battery, you may already be able to listen to radio station with headphones. Then we will discuss how to tune radio. The picture below shows reverse side of radio we made:
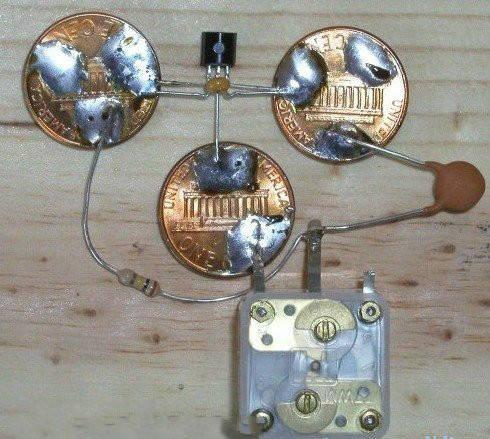
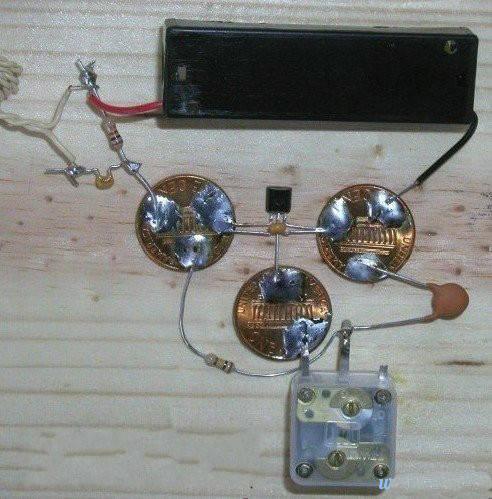
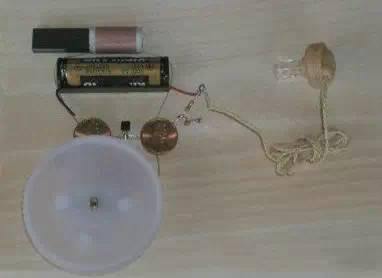
Turn it over, we will see its front side, as shown below:
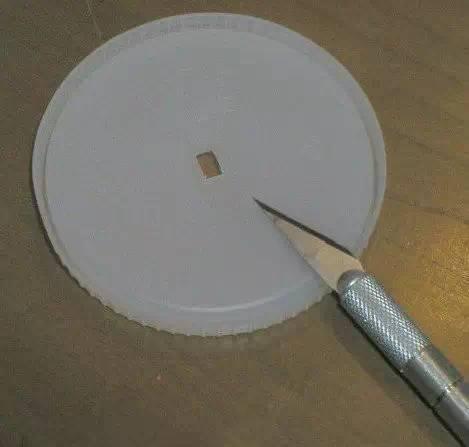
There are two ways to tune radio. First, slowly move magnet in and out of coil, this is a rough tuning, it will be more difficult for you to get to desired station, because even a small movement will change frequency to another radio station. The second best way is to adjust copper rod of the variable capacitor. For better fine tuning, we made a large handle out of a plastic bottle cap. Here's how:
Step Eleven: FM
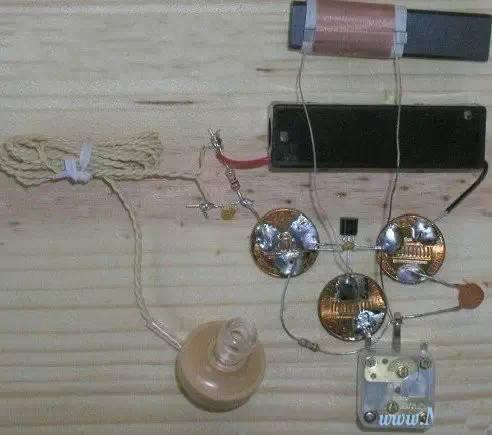
Since magnetic bar can still move in coil, adjusting stations is inconvenient, so we need to fix it in one place so that we can receive all stations by adjusting variable capacitor. To do this, turn variable capacitor all way to left, slowly insert magnet into coil until you hear first station, then glue magnet in place, you can also attach battery clip.
Finally, your radio with three coins is ready!
Related
- Homemade radio for three coins, pretty cute
- Three common grounding methods in circuit design
- What is three anti-paint? How to use it correctly?
- A detailed explanation of three commonly used LED drive power schemes.
- Explain in detail difference and application of two-three-four-wire system.
- Three circuit diagrams to teach you how to understand how a buck RC works
- The best switching circuit design process for power supplies is a must for engineers!
- How to distinguish induction from leakage, we will teach you three tricks! Ordinary people can also learn super practical
- Commonly Used Diode Circuits Essential for Engineers
- Six Methods for Testing PCB Short Circuits
Hot Posts
 How to distinguish induction from leakage, we will teach you three tricks! Ordinary people can also learn super practical
- What is drowning in gold? Why Shen Jin?
- This is a metaphor for EMI/EMS/EMC that can be understood at a glance.
- How many types of pads have you seen in PCB design?
- Summary of Common PCB Repair Techniques
- What is three anti-paint? How to use it correctly?
- Knowing these rules, you will not get confused looking at circuit diagram.
- How to make anti-interference PCB design?
- Can diodes do this?